Sunday, January 3, 2016

Room Number Two - DONE

We didn't take any good "before" photos, but here are some "after" photos of the second room completed; our study. Don finished the last detail today; hanging the Venetian blinds. Twenty-four years ago, when we moved into the house, the room was paneled in dark knotty wood, had brown fabric shades, and a brown shag carpet and a built-in rough wood dresser. It served as Carl's bedroom. After Carl moved out, we pulled up the carpet and Don refinished the oak floor. We took out the built-in dresser and added bookcases. We painted over the wood paneling with a bright blue of Emily's choosing and exchanged the bed for a futon/couch. The room evolved over the years into our study, with the addition of an oak desk from Don's work that we rescued from being dumped (now Sami's desk), and the little roll top desk that was Don's father's desk (now Don's desk). Of course computers and printers and the tables that hold them have evolved. However, we both still prefer a desktop computer to a notebook or tablet. When we got serious about the remodel we switched out the futon for a large wardrobe, to make up for the lost closet space on the main floor that was being turned into part of the kitchen. Don ripped out the north wall, added insulation, and rebuilt it. Sami refinished some of the wood trim and Don rebuilt some. Sami gave everything fresh paint; "owl gray" for the walls, and a warm white for the trim. We are especially fond of the Venetian blinds because their horizontal lines contrast with the vertical lines of the now gray paneling.

It is a room where we spend a lot of time, and we are happy with its quiet, peaceful qualities. We may still hang a picture or two, but we are officially checking it off as COMPLETE!

Looking north to Sami's side.


Looking south-west to Don's area.


Tuesday, December 29, 2015

Step-By-Step

Our children very thoughtfully hosted Christmas; therefore we have not lost momentum on the remodel. Now that the project is ours we accomplish what we can each day and no more. The last thing Corey did was install cabinets, so our "galley" has finally returned.

Old houses are not entirely square, so there is a shim here and there.
We are eager to add floor, tile back splash, and appliances. But first the counter top people must do their work.
The reality is we move ahead step-by-step and will probably be at it for two or three more months. Currently Don is laying the sub-floor in the main floor bath room and preparing the door to that room. He has "re-purposed" the door that before joined the little diagonal hallway and the front entry. With the new floor plan it is no longer needed.

Sami painted her "Eldon" desk four and a half years ago (see entry May 26, 2011). One of her first remodel projects. Finally, the last touch has been added; the cushions!

Since we will continue to use our basement kitchen for several more months, Sami covered the temporary counters, which were beginning to suffer from all of the use, with some bright oil cloth that was a Christmas gift from Claudia.

Sami can remember when it was standard practice to cover rental house counters with oil cloth

Friday, December 18, 2015

On the First Day...

Christmas may be only seven days away, but our big countdown started last Wednesday when the cabinets were delivered, a total of 22 big boxes. Corey was here yesterday to lay out lines for positioning the cabinets on the kitchen walls using his laser leveling system.  He's back today to finish unpacking and finish the lines on the walls.  Don is helping with the two-person stuff. 


Sami has painted the kitchen walls "Lapland," a soft olive green in preparation. Corey and an associate will install the cabinets over the weekend, and Corey will return next week to work on the two custom cabinets that will be inserted into the walls


The quarter-sawen oak looks and smells lovely. Pretty nice Christmas gift!

This cabinet will go over the range hood


Friday, December 4, 2015

None of the Above


Don searched everywhere for the old window trim that he had stored when he installed the new windows five years ago, but could not find the trim for the upstairs front windows. So he bought new material and built new trim and sills. Of course he spotted the old trim right after he had finished building the new - leaning against his work bench!

Way back in 2011, at the beginning of the project, we put new windows in the study and tried to figure out what color we wanted the paint that room. We sampled several greens and yellow-golds on the wall, but didn't really like any of them (see entry 5/5/2011). Now, five years later, we have decided to go in a different direction and chose a gentle, warm-gray called "gray owl." What made us decide on gray is the fact that we love the gray in the bathroom and wanted to continue the theme throughout the upstairs.


Our plan is to paint all the rooms in the house and we have come up with a color scheme that flows from room to room. The salesman at the Benjamen Moore paint store is getting to be a close acquaintance!

Sami put in an 8 hour day painting the study. Its about half done.

Thursday, November 19, 2015

First Finished Surface


About two weeks ago a silence descended upon our house; one we had not heard for several months. All of the contractors left along with their drilling and sawing and banging. The silence signaled a dramatic change, at least for a while. The project is now OURS. Time for a whole bunch of sweat equity.


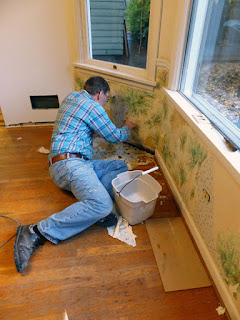
Don has been diligently working on the surfaces in the bathroom and polishing up the uneven spots with mud, putty knives, and primer. 

We haven't seen the green wallpaper for about 25 years.

 We have made many trips to the paint store and we have two finished surfaces to show for all of the work. The front door is finished, inside and out and the dining room ceiling and upper trim is done.

Our worn, old front door looks much better.
Painting the inside brightens up the entryway.
Ceiling and molding are done!

Other elements of the remodel are moving forward too. the cabinets are in a queue to be built and should arrive the middle of December. We had to revisit the back splash tile design about four times, as the space for it morphed more than once, because drawings we were working with did not reflect the realities of our range, hood and cabinets. We’re excited about the final product. It is full of lovely fruits, vegetables and little animals; including a snail and a mouse. Eeek! We have selected products for the kitchen counters and floor as well as the bathroom floor.

We have selected a manufactured quartz for the counter tops and a vinyl tile for the floor.


Sunday, November 1, 2015

Our Turn


The flurry of activity last week made very visible progress. With the sheet rock all in place, the space is defined. The new under-layment for the floor in the kitchen means that room is sealed off. We can no longer see into the basement through the knotholes and gaps in the floor, nor can we see into the main floor bedroom and bath areas from the kitchen through the skeleton of naked framing.

Mid-way through matching the ceiling texture
Its a match!

The final step in the sheet rock job was to match the texture on the walls and ceiling from the old areas to the new. The dust from all of that work has settled (a LOT of dust!), and we find ourselves in the middle of a project that we now largely own. We have about six, or so, weeks to wait until the kitchen cabinets are ready to install. In that time we hope to do many of things that are on our sweat equity list. First we must spend a few days delivering our house from all of the white dust and grit left from the sheet rock work. After that, our list is long. Don has begun by refinishing the front door, giving the new walls a coat of primer, and repairing the several areas of the floor that have been damaged over the years or by the remodel. Sami has spent the last few days musing about colors to use throughout the house. The Benjamin Moore Web site has proved to be a very useful tool to visualize color combinations, and Powell’s Paint Center, just a few blocks away, has supplied many paint chip samples. The names given to the colors are as fun as the colors; “Lapland,” “Rustic Brick,” “Gentle Cream,” “Brittany Blue,” “Snowfall White.”

Some colors we are considering together with the kitchen tile and cabinet oak.

For the first time in quite a few months we can pull our cars into our driveway free and clear. Gone are the contractors cars and their port-a-potty, and gone is the old dishwasher. That was taken by the appliance store when the delivered our new refrigerator and dishwasher. The new is finally replacing the old. There is still lots of work ahead of us, but things are beginning to take shape.


Friday, October 23, 2015

A ‘MUDDY’ MESS, but lots of progress!


In two weeks a lot has happened. At last elements are being added that bring the project closer to their end result. Final tweaks to the plumbing and electrical systems were made before the sheetrock would seal those systems into the walls. Before sheetrocking, both Don and Corey spent hours adding shims to wall studs, to make the walls ‘flat’ and to compensate for the difference between the thickness of the sheet rock and the old lath and plaster. This will allow for better cabinet installation, and make the door and window trim be flush to the walls. Interestingly, some of the shimming was done with cardboard strips made for the purpose; others were cut from scraps of wood.

Next, Corey installed insulation in the exterior walls. Don added more insulation around the sewer pipe next to the peninsula, to quiet the flushing sounds in the sewer pipe that runs next to the seating area.

Don is always busy after the crews leave.
Insulation in the exterior kitchen wall

Next, the sheetrock crew took over. First piles of materials and equipment were delivered. Then, the sheetrock was installed by the ‘hanger’ team of two men. Amazingly they did it all in one day; kitchen, part of dining room and entry hall, closet in bedroom, and the full new main floor bath! The next day a new worker came and cleaned up the area. Later another two man team came and did the initial taping and ‘mudding.’ When they left we set up fans to help dry the ‘mud.’ They skipped a day to let the mud fully dry, and then came back again and did a second pass. More fans running day and night to let it all dry.

They will be back another day to do the final sanding – uggh, the DUSTiest part of this project!. Yet another worker will be here later to texture the patched areas in the dining room ceiling, and some wall areas needing matching texture to the old plaster walls. The kitchen and bathroom, since they are all new sheet rock, will not be textured.

The complexity of the electrical and plumbing, some of which took lots of effort to work out, and which occupied us for weeks is now hidden behind the walls. We have taken lots of photos, so if walls are ever opened up again, there will be no surprises. Now all we see are switches and outlets. Here are some pictures of that work.

Materials delivered, ready to start hangin'
Sheetrock hung
Here’s the peninsula area and the hall to the front door.  You can see signs of the funny old angled hall.
View from the kitchen to the garage
The new closet in the main floor bedroom. We think this is the way it was when the house was built.
Back wall of bathroom; sink and medicine cabinet on right, and shelves above the toilet on the left.
Right wall of bath—shelves to be, and shower.

Another significant thing was getting our heating system back on line. It’s been getting pretty cool at night. The furnace was shut down and the thermostat removed when the initial demolition was done, as the thermostat was in a wall that went away. Don was able to fish the thermostat wires through an old wall and installed the thermostat along the side of the stairs. This was a chance to test out the new duct work that feeds heat upstairs, as the old duct went away with the same wall that had the thermostat. The new duct took some trickery to snake around both in the basement ceiling, and in the wall and ceiling of the new kitchen peninsula area. Here are some pictures of this work
 
Here’s the ducting that was done in the basement ceiling.
We are lucky its been a warm fall. Finally the thermostat is in its new home.

Susan, the cabinet person, came along with Corey, to take final ‘field’ measurements for the cabinets, and to discuss details, to get the cabinet order rolling. This is the biggest expenditure of the project next to the labor (think 5-digit $$), so attention to detail is warranted here. Don returned to Pacific Cabinetry (in Vancouver) yesterday, to work out some details on the two custom cabinets they will build (for the old pantry cupboard, and for the old phone nook). We will presumably meet with Susan early next week to officially place the order and pay a deposit

Mud, mud, everywhere. Next, a clean-up and then the underlayment for the floor. Hopefully that will be an end to this very messy phase.

Whew!  Guess that’s enough to report on for now.